SECTIONS:
How to Update Cleaning Types
How to Update Boards
How to Add Floors
How to Activate Pre-loaded Inspection Templates
How to Add New Inspection Templates
How to Edit Templates
How to Update Cleaning Types
NOTE: First time Cleanings Plus Users will be guided through a few easy steps to get started. The instructions below show you how to manage your Settings AFTER that process.
1. From the desktop Cleanings Plus app, click the Settings page button. This will direct you to the Cleaning Types tab.
2. Choose between Time or Credits. In this example we will walk through setting up Credits.
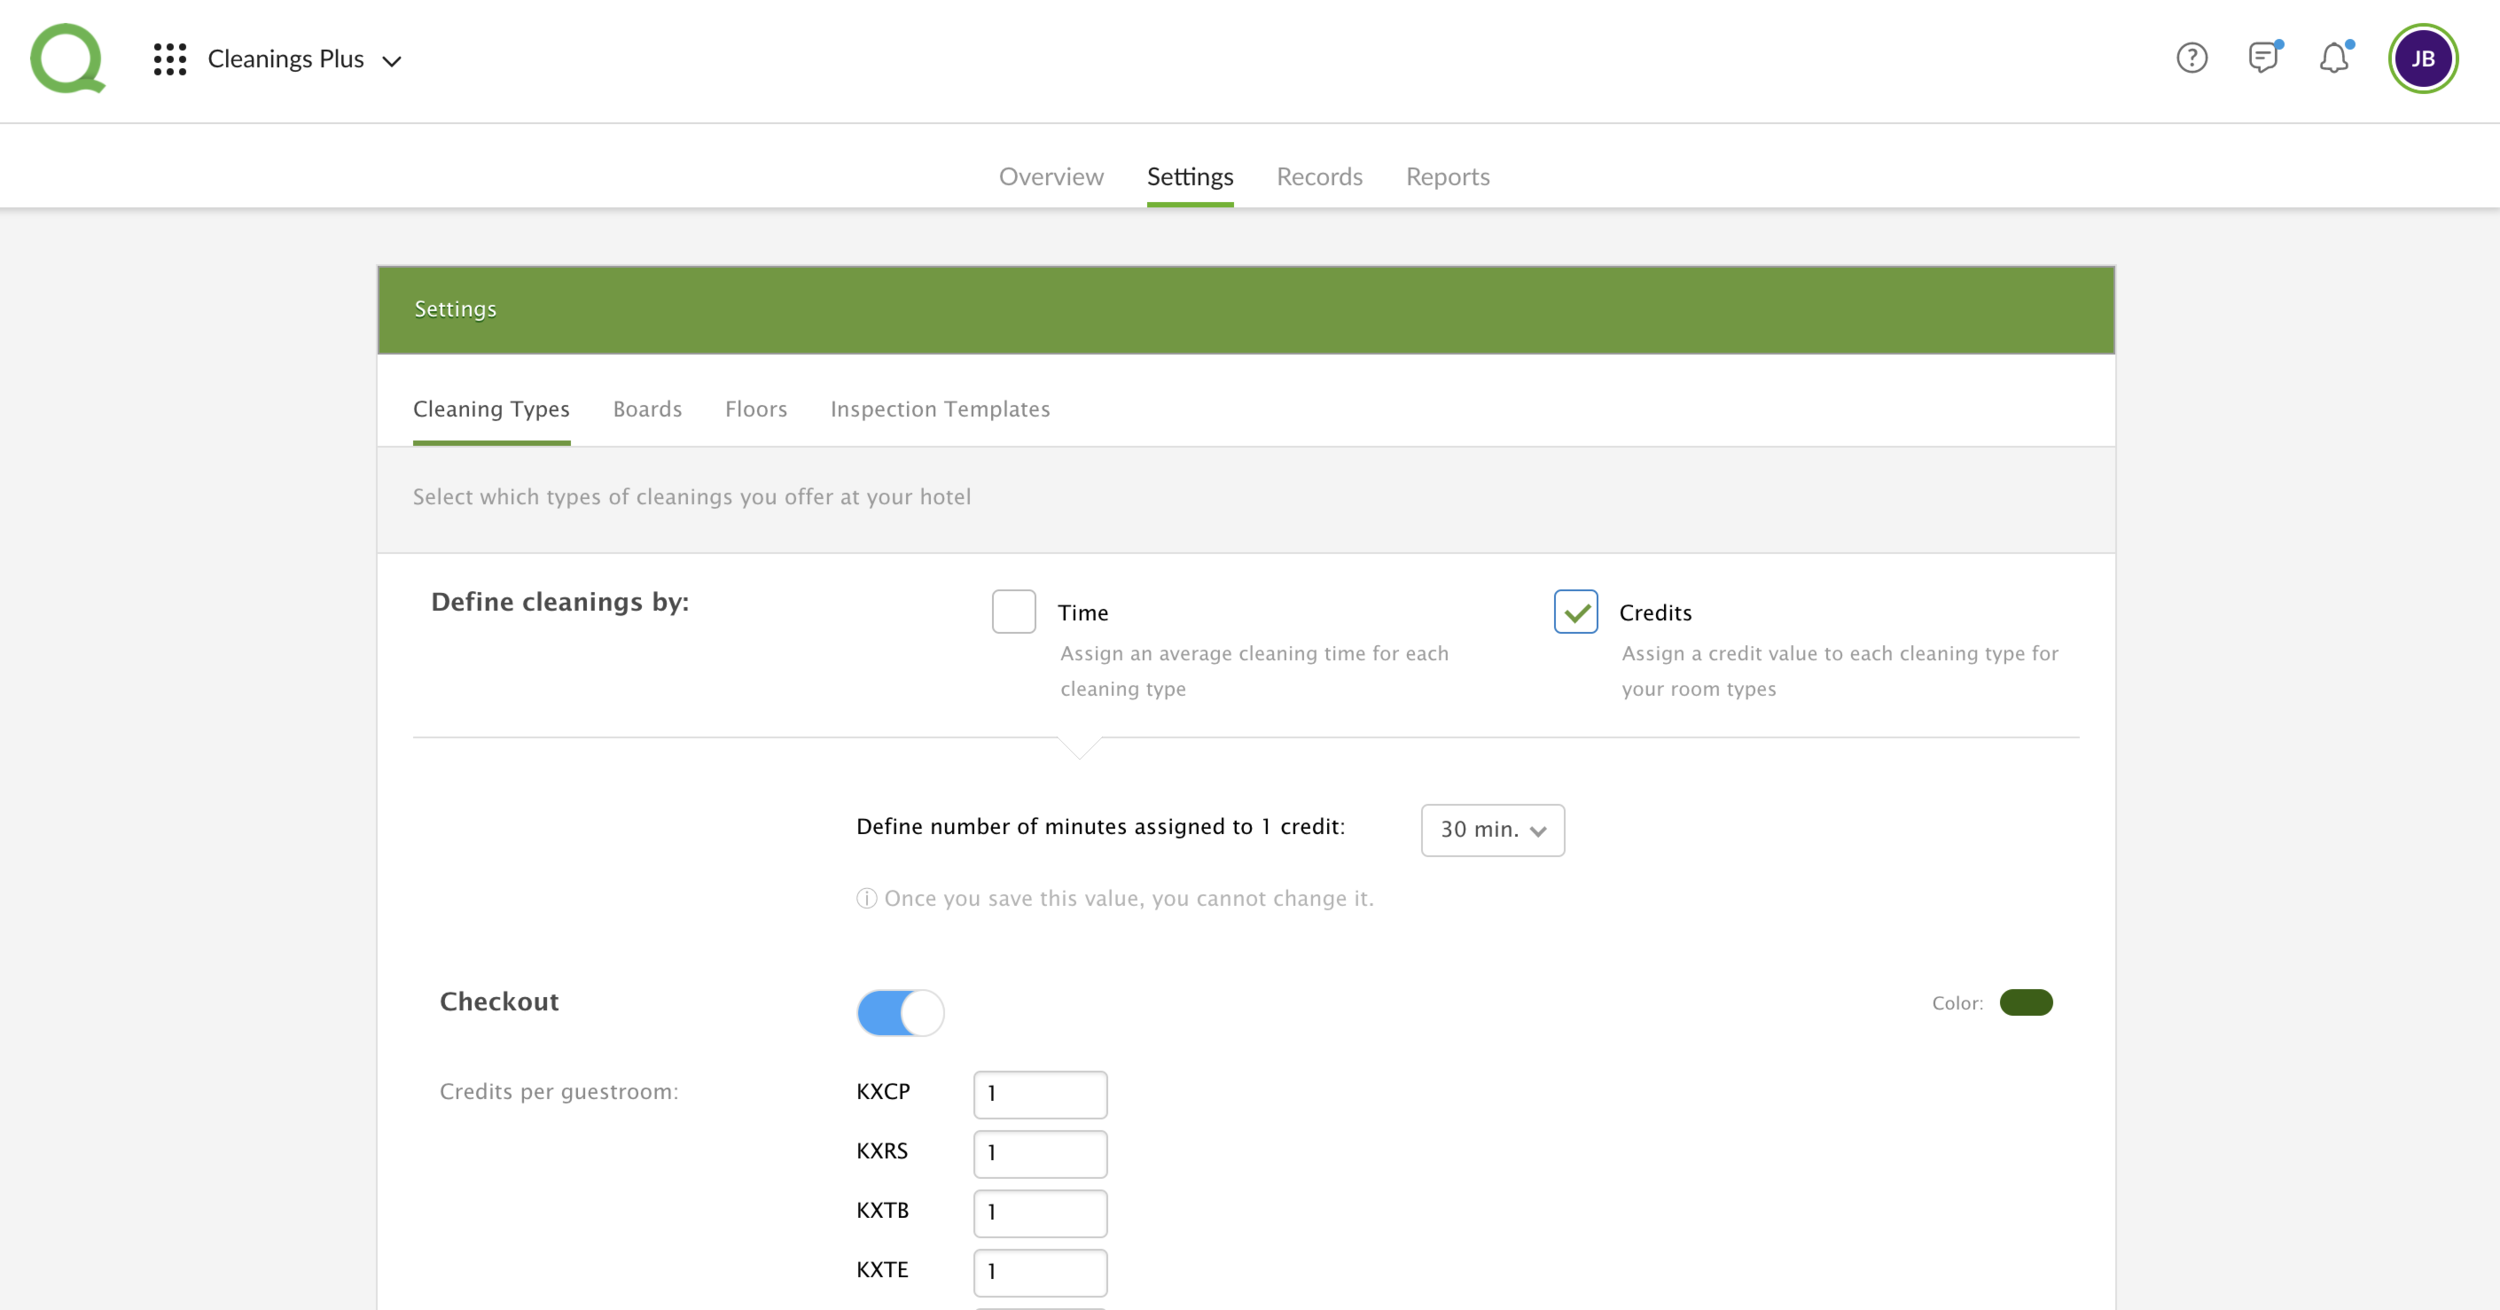
3. With Credits you’ll be asked to designate the time that 1 Credit is worth before advancing. This will be your baseline for all room types and this action cannot be undone after saving.
4. . Begin assigning credit values to each room type under the different Cleaning Types. For example, for Checkouts I know my KXCP rooms take 1 credit (30 minutes).
 5. Repeat this step until all active cleaning types have credit values for every room type.
6. Click Save when finished.
How to Update Boards
1. From the desktop app, click the Settings page button.
2. Click the Boards tab.
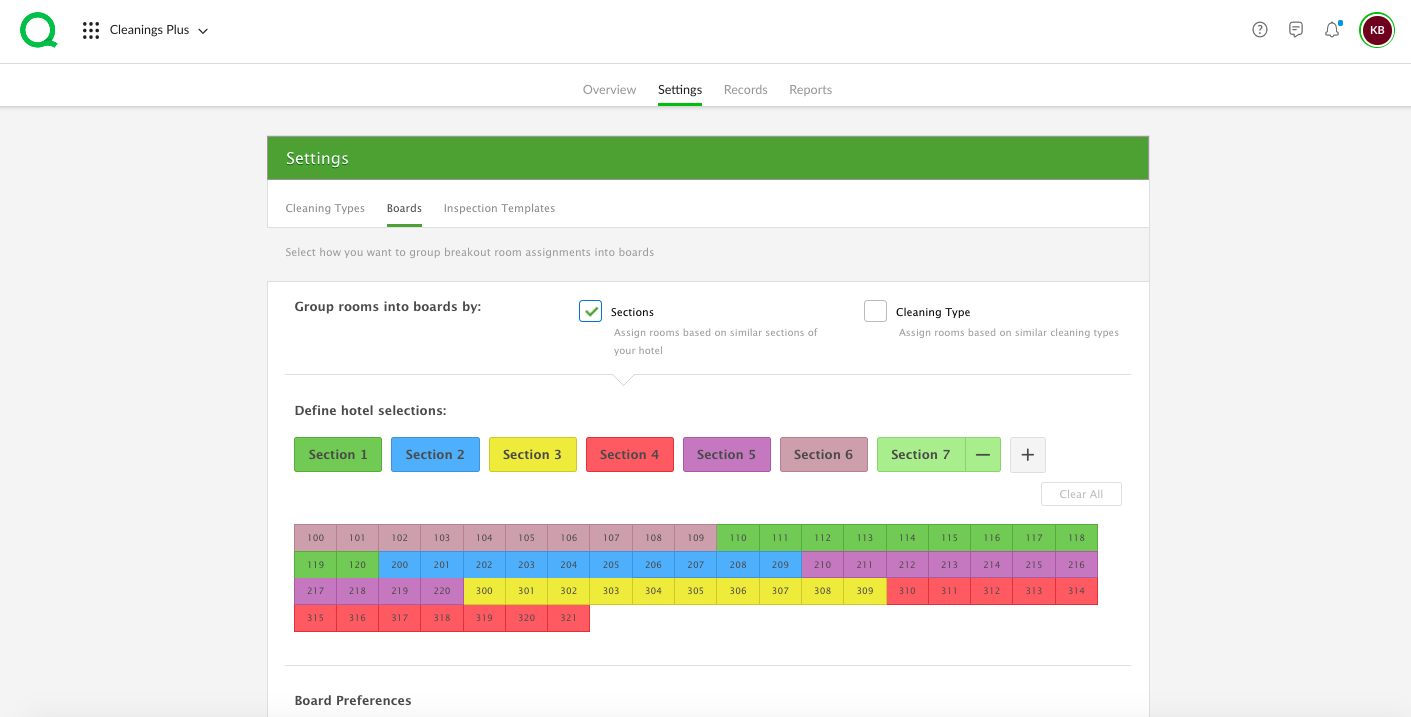
3. Click the Sections checkbox if you wish to assign rooms based on sections of your hotel, or click the Cleaning Type checkbox to assign rooms based on cleaning types.
4. Define your hotel selections using the color-coded sections grid. If you wish to either add new rooms to a section or to change a room from one section to another, first click the colored section button under “Define hotel selections”, then select guestroom numbers you want to add to that section.
5. Use the Board Preferences section to set your maximum shift time for breakout, time included for lunch and breaks, whether your housekeeper boards lock high priority rooms, and the number of unlocked rooms to display.
6. Use the Special Guestroom Projects section to modify settings. Use the switch to activate and deactivate special projects included in Checkout rooms. Use the dropdown menus to determine frequency and the total time allotted for the project.
7. Click the green Save button at the bottom of the page to save all changes. A message will appear confirming that your changes have been saved.
How to Add Floors
1. From the desktop app, click the Settings page button.
2. Click the Floors tab.
3. Type the name of the floor then click the + symbol to add anther floor color.
4. Next, click the name of the floor then click the corresponding rooms on the grid to match the floor names with the rooms.
5. Click Save when finished.
-
Pro Tip: These floors will populate in a dropdown on the Breakout Overview page that will allow you to filter your rooms by floor.

How to Activate Pre-loaded Inspection Templates
1. From the desktop app, click on the Settings page button. This will direct you to the Cleaning Types page.
2. Locate the cleaning type you wish to assign the template to. For example, the Checkout cleaning type.
3. Use the Inspection Checklist dropdown to select the template you wish to use.
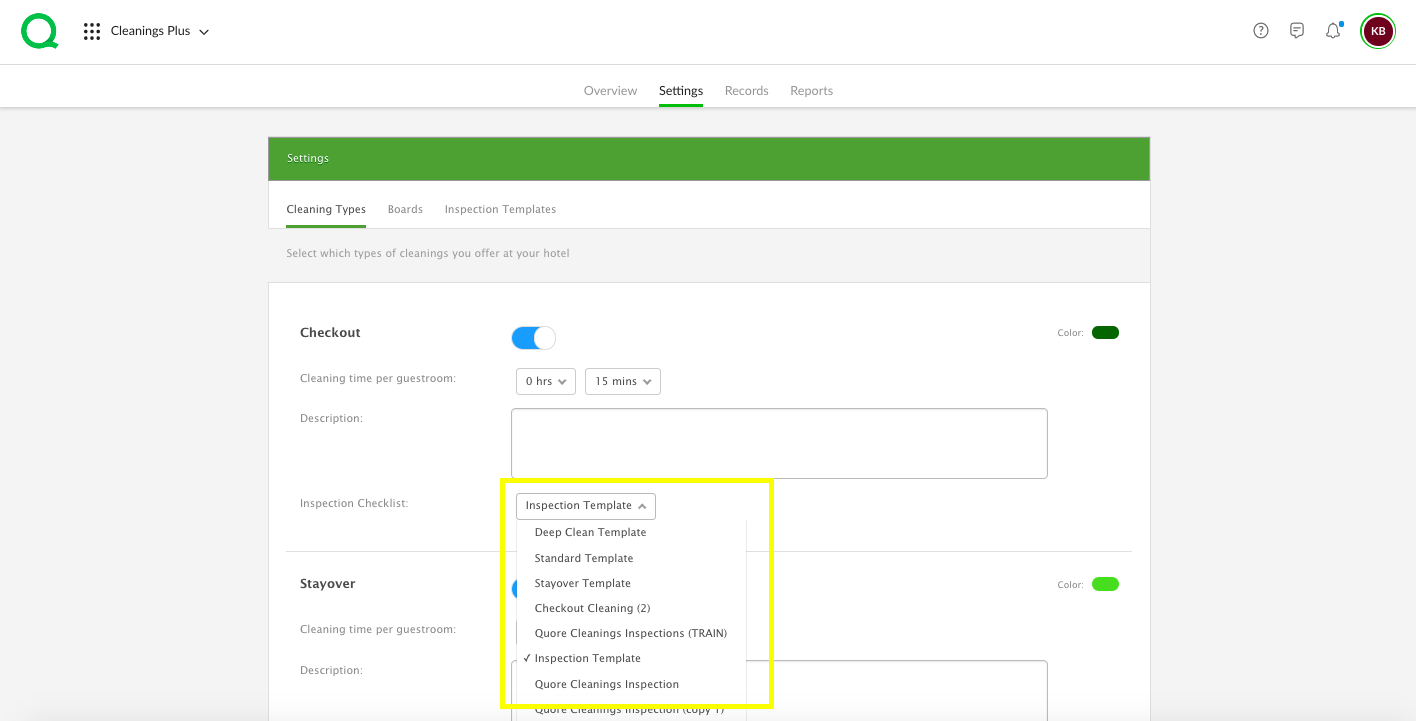
4. You can repeat the steps above to assign inspection templates to other cleaning types.
5. When you are finished, scroll to the bottom of the page and click the green Save button. A message will appear confirming your changes have been saved.
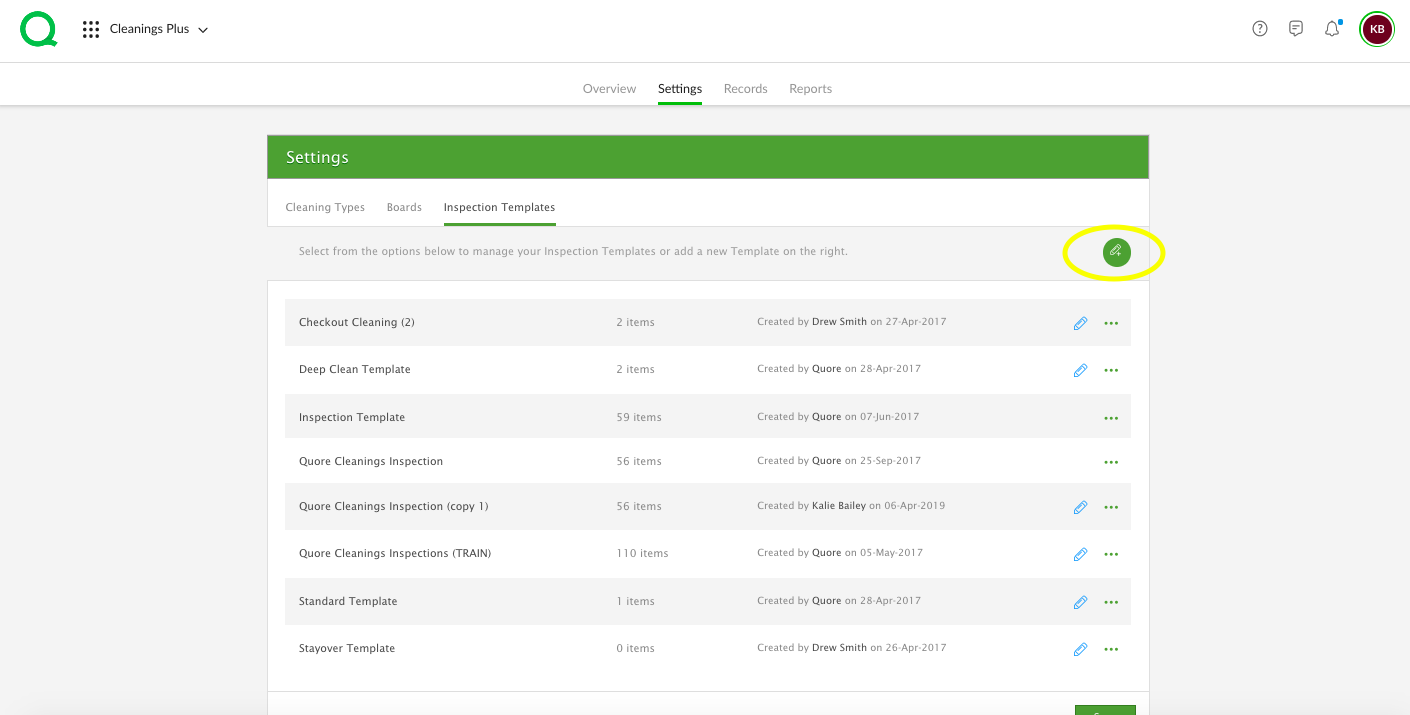
How to Add New Inspection Templates
1. From the desktop app, click on the Settings page button.
2. Click on the Inspection Templates tab.
3. Click the green pencil icon in the upper right corner to add a new cleaning inspection template.
4. Enter the template name.
5. Click the green Add New Template button.
6. Add an inspection item using the + New Item link in the upper right corner of the inspection template.
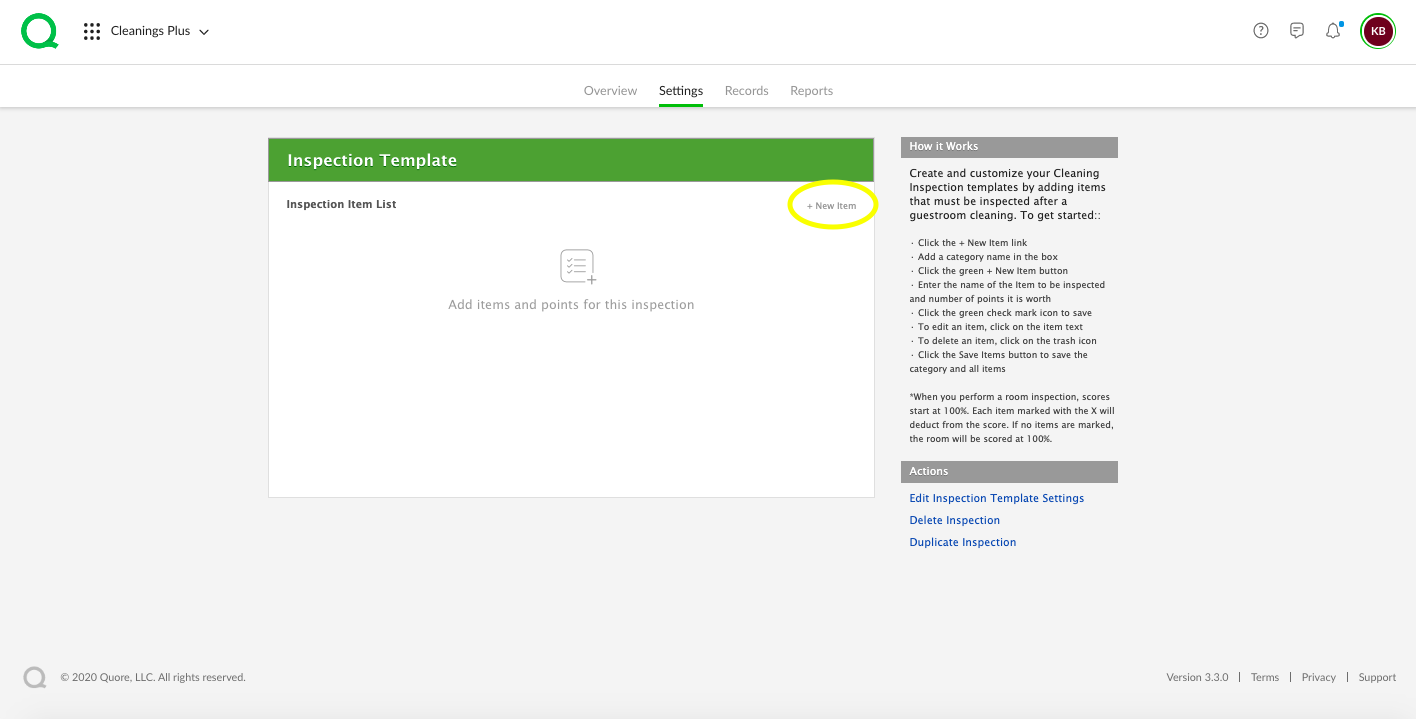
7. Add a category name in the Category Name field. Click the green + New Item button to add new items to this category. Type the number of inspection points this item is worth in the Points field and enter the item name in the Item Name field, then click the green checkmark to the right. To add multiple items, click the green + New Item button and repeat the steps in the previous sentence.
8. Click the green Save Items button when finished.
How to Edit Templates
1. From the desktop app, click the Settings page button.
2. Click on the Inspection Templates tab.
3. Click on the template you wish to edit.
4. To edit an existing item, click the Edit button to the right of the item. From within the popup editor, click on the Category Name field to change the category’s name. Click on the line item to enter new text or assign a different number of points to that inspection item. Use the green + New Item button to add new items to the category. To save your changes, click the green Save Items button. If you wish to delete the category, press the red Delete Category button, followed by the red Delete button.
5. To add a new cleaning inspection category or item, click on the + New Item link in the upper right corner of the template. From here, add a category name in the Category Name field, use the + New Item button to add new items to the category, and use the points and item fields as needed. Click the green Save Items button to save your changes.